How To Reuse Stickers Without Damaging Or Tearing Them
Learning how to reuse stickers can help you preserve your favorite designs and reduce waste. Careful heating, slow removal, clean storage, and the right replacement adhesive can give many stickers another life without tearing them, stretching them, or contaminating them. In this guide, we break down how to reuse stickers without damaging or tearing them.

Key Takeaways
- Warm the adhesive gently before lifting the sticker.
- Peel slowly and support the material near the lifting point.
- Store removed stickers on release paper or another suitable backing.
- Keep the adhesive clean and avoid touching it with your fingers.
- Use removable replacement adhesive when the original glue has failed.
Table of contents
How To Reuse Stickers
Many stickers can be reused when they are removed slowly, kept clean, stored on a suitable backing, and reapplied with the original adhesive or a removable replacement. Success when reusing stickers depends on the sticker material, its age, the condition of the adhesive, and the surface where it was originally applied. Here is the basic how-to process for reusing a sticker:
- Warm the sticker gently with a hair dryer to soften the adhesive.
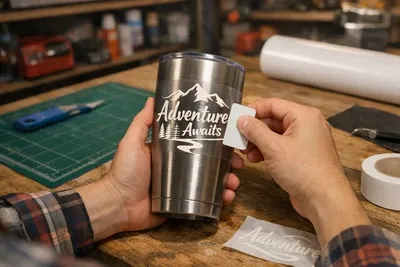
- Lift one corner using a fingernail or thin plastic card.
- Peel at a low angle while supporting the sticker close to the lifted point.
- Place the sticker immediately on release paper or an empty sticker sheet backing.
- Remove loose dust from the adhesive and clean the new surface separately.
- Reapply the sticker using its original adhesive or a suitable removable replacement.
Stickers do not need specific marketing as reusable for them to be reused. Vinyl, laminated, and repositionable designs generally survive removal more than thin paper. Even strong vinyl may stretch if aged, pulled falsely, or removed from rough surfaces. So when readers ask whether you can reuse stickers, they must inspect each piece, as flexible stickers with clean adhesive offer the best chances for successful re-application.
Make a lasting impression with custom stickers
Turn your logo, artwork, or message into high-quality custom stickers that strengthen brand awareness and give your packaging, giveaways, and promotional materials a professional finish.
How Can You Reuse Stickers Without Damaging Them?
Softening the adhesive with gentle heat, then lifting one edge carefully allows you to peel slowly while supporting the material. Rushing causes stickers to stretch, tear, or curl. Patience is essential when removing a sticker; support it as you peel and watch the separation closely to avoid any damage. You can follow the method below to remove and reuse a sticker without damaging it
- Stop if the material begins stretching or becoming narrow
- Add gentle heat if the edge curls tightly
- Pause if the paper layers start separating
- Reduce the heat if the printed ink or coating appears to lift
- Change the peeling angle if the sticker begins cracking
Test this method on an unimportant sticker before working on a rare, sentimental, or expensive design. Testing shows how the material and surface respond to warmth and pressure. It also helps you decide whether removal is worth the risk.
Does Heating A Sticker Make It Easier To Remove And Reuse?
Gentle heat softens pressure-sensitive adhesive, making the sticker easier to remove. However, heat cannot permanently restore glue that has dried out, become contaminated, or remained attached for too long. Set your hair dryer to a low setting and hold it several inches away. Move the dryer continuously for ten seconds, then test an edge. Short intervals provide more control.
Avoid heat guns or high-temperature tools, as excessive heat curls paper, stretches vinyl, or fades finishes. Stop if surfaces become uncomfortably hot, the sticker changes shape, or any bubbles appear.
How Do You Remove A Paper Sticker Without Tearing It?
Paper stickers absorb moisture and tear easily. Use gentle warmth and minimal force when learning how to remove and reuse stickers made from paper. Lift a corner with a fingernail or thin plastic card. Avoid blades, as they cut the sticker or scratch surfaces. Pull slowly, keeping your other hand close to the separation point.
If paper layers begin splitting, stop and apply warmth. Torn layers rarely restore neatly. Once removed, place the sticker flat on release paper immediately. This prevents curling and creasing and keeps the adhesive from folding onto itself.
How Do You Remove A Vinyl Sticker So You Can Use It Again?
Flexible vinyl normally tolerates removal better than paper, but it can stretch when pulled quickly. Lift an edge and pull at a low, controlled angle. Support the vinyl close to the point where it separates from the surface.
Thick laminated decals may require slightly more warming than thin sticker sheet designs. Apply heat gradually because too much can distort the vinyl or cause its layers to separate.
Removable vinyl is designed to release more easily. Permanent outdoor vinyl uses a stronger adhesive and may deform or leave glue behind. When considering how to remove stickers to reuse, expect better results from removable vinyl than from weathered permanent decals.
Want stickers designed for repeated use?
Create personalized reusable stickers that can be removed, stored, and reapplied for product displays, decorations, branding, and other projects requiring greater flexibility.
Explore custom reusable stickers hereWhat Should You Put Used Stickers On To Save Them?
The best answer to what to put stickers on to reuse is silicone-coated release paper or the backing from an empty sticker sheet. These surfaces protect the adhesive without bonding to it permanently.
| Backing material | Suitability, storage duration, and drawbacks |
|---|---|
| Release paper | Excellent for long-term storage. It releases cleanly but may need to be purchased separately |
| Empty sticker sheet backing | Excellent for medium or long-term storage. Space may be limited |
| Wax paper | Suitable for short-term storage. Some coatings may transfer or grip certain adhesives |
| Reusable sticker book | Excellent for organized storage. Quality and page coatings can vary |
Avoid using printer paper, tissues, cardboard, or fabric for storage. Adhesive bonds to these fibers, which reduces tackiness and creates uneven surfaces upon removal. Anyone who frequently collects or reuses stickers should consider a reusable sticker book or dedicated release paper. These options keep your designs organized, flat, and ready for their next successful application.
How Can You Keep Removed Stickers Clean And Flat?
Handle a removed sticker by its edges to prevent oils and lint from weakening the adhesive. Immediately place the sticker on its storage backing. Store stickers in a sealed container, choosing a dry area away from sunlight, moisture, and temperature extremes. Heat softens adhesive, while cold makes materials brittle.
If a sticker curls, attach it to release paper and place a lightweight book over it. Do not press books directly onto the print. Label backing sheets by theme or size instead of stacking stickers loosely to preserve your collection’s condition.
How Long Do Reusable Stickers Last?
A reusable sticker may survive several moves, though its lifespan depends on material, handling, and storage. Purpose-made reusable stickers and static clings handle movement well. Vinyl decals tolerate careful handling, but paper stickers weaken quickly during removal.
Stop reusing a sticker once it shows cracked material, severe curling, fading, or contaminated adhesive. While proper storage extends its life, no sticker can be restored indefinitely.
How Do You Make An Old Sticker Sticky Again?
Clean surfaces to fix mild adhesion loss. Use a removable replacement adhesive if the original glue is dry or contaminated. The safest way to restick a sticker depends on the material and how often you need to move it. Follow the steps below.
- Inspect the sticker for tears, curling, loose layers, and missing adhesive.
- Remove loose dust with tweezers or a soft, dry brush.
- Clean the destination surface and let it dry completely.
- Test the existing adhesive on a small suitable surface.
- Apply a thin, even layer of removable replacement adhesive if needed.
- Position the sticker carefully and allow the adhesive to set as directed.
The goal is not to make every sticker permanently sticky. Choose an adhesive matching your needs, as displays require removable options, while crafts may need stronger bonds. Always test repair methods on one corner first, since inks, paper, coatings, and vinyl react differently to various replacement adhesives.
How Do You Clean The Sticky Side Of A Used Sticker?
Use tweezers to lift lint or a soft brush to remove dust. Avoid scrubbing, as this rolls adhesive into lumps or removes it entirely. Water, alcohol, and household cleaners often dissolve or contaminate the glue, so avoid these unless you are certain the material can tolerate them.
Clean the destination surface separately with a residue-free product. Let it dry completely before application, because poor adhesion usually stems from surface dust or moisture on the destination rather than a ruined sticker.
What Is The Best Adhesive For Resticking An Old Sticker?
The best adhesive depends on the sticker material and whether it must remain removable.
| Adhesive option | Best uses and limitations |
|---|---|
| Repositionable spray adhesive | Good for paper, vinyl, crafts, and larger designs. Apply a light, even coat with suitable ventilation |
| Removable glue dots | Good for temporary displays and thicker stickers. Dots may create small raised areas |
| Double-sided adhesive sheets | Good for paper and flat cutouts. They provide even coverage but require careful trimming |
| Low-tack transfer tape | Good for temporary mounting and delicate crafts. Test first because tack levels vary |
Avoid thick craft glue, super glue, hot glue, and construction adhesive. These products can soak through paper, stiffen vinyl, create visible lumps, stain the design, or make future removal impossible.
When the original glue is unusable, choose a purpose-made removable adhesive or sticker restoration product. It offers more control than a permanent household glue.
Create removable designs with custom static clings
Personalize static clings with your logo, text, or artwork for a reusable option that works well on windows, glass displays, and other smooth surfaces without conventional adhesive.
How Can You Turn A Regular Sticker Into A Reusable Sticker?
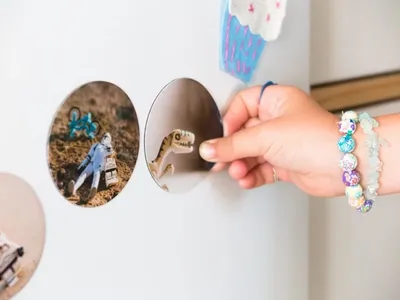
A regular sticker can become repositionable when it is mounted on a magnetic sheet, removable vinyl, reusable cling material, or a laminated cutout with temporary adhesive. This changes how the sticker works but can protect the original design from repeated peeling.
| Method | Cost | Difficulty | Durability | Best use |
|---|---|---|---|---|
| Magnetic sheet | Medium | Easy | High | Lockers, refrigerators, and metal boards |
| Removable vinyl backing | Low | Medium | Medium | Smooth indoor surfaces |
| Reusable cling material | Medium | Medium | Medium | Glass, mirrors, and acrylic |
| Laminated cutout | Low | Easy | High | Crafts, displays, and sticker books |
Covering or replacing the original adhesive permanently changes the sticker. That may be preferable for a valuable design that you do not want to peel repeatedly. Photograph or scan sentimental stickers before modifying them so you retain a copy of the original artwork.
What Surfaces Are Best For Reusing Stickers?
Smooth, non-porous surfaces like glass and metal offer the easiest reapplication. Rough materials like fabric or cardboard grip adhesive unevenly, which often causes stickers to stretch, tear, or collect fibers. Test delicate surfaces first, as even removable adhesive may damage them. Careful sticker application without bubbles improves contact and reduces creases, making future removal much easier.
Can You Turn An Old Sticker Into A Window Cling?
An old sticker cannot automatically become a true static cling. However, its design can be mounted on clear cling vinyl or a reusable transparent sheet.
- Remove loose dust and flatten the sticker on release paper.
- Trim a piece of clear cling material slightly larger than the design.
- Mount the sticker or a protected cutout onto the cling material.
- Smooth it carefully to remove wrinkles and trapped air.
- Apply the finished piece to clean, dry glass.
An adhesive-backed sticker bonds using glue. A true static cling attaches through static attraction and can normally be moved without leaving adhesive behind. Converted designs work best indoors because sunlight, moisture, and temperature changes may shorten their lifespan.
How Do You Remove Stickers From A Water Bottle And Reuse Them?
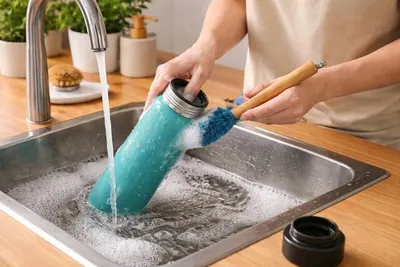
Empty and dry the bottle first. Warm the sticker gently and rotate the bottle while peeling to support the lifting edge. This controlled movement is central to how to remove and reuse stickers from curved surfaces. Stainless steel tolerates heat well, while coated metal needs caution, as heat affects the finish. Glass is firm, but thin plastic may deform, so use minimal heat.
Do not soak paper stickers to preserve them. Avoid sharp tools that scratch the surface. After saving the design, remove the remaining adhesive. ImprintNow explains removing remaining adhesive residue from smooth surfaces.
Looking for affordable custom stickers?
Create cost-effective rectangle stickers for packaging, events, giveaways, or everyday branding, with customizable sizes and designs to suit your project.
Get started with rectangle stickers hereWhat Mistakes Can Damage A Sticker During Removal Or Reuse?
Common mistakes like the ones below can turn a reusable sticker into a damaged one;
- Pulling too quickly can tear paper and stretch vinyl.
- Overheating can curl paper, distort vinyl, and damage the surface below.
- Using blades can cut the sticker or scratch its original surface.
- Touching the adhesive can transfer oils, dust, and lint.
- Folding the sticker can create permanent creases and weak points.
- Storing it on unsuitable paper can contaminate the adhesive with fibers.
- Adding new adhesive before cleaning can trap dirt and create lumps.
- Repeatedly moving delicate paper stickers can weaken their fibers and printed coatings.
Before removal, identify the sticker material and inspect the destination surface. Prepare a plastic lifting tool, a hair dryer, and suitable storage backing. Clear a clean workspace and choose the gentlest method first. These preparations improve the likelihood that how to remove stickers to reuse will produce a clean result.
Frequently Asked Questions About How To Reuse Stickers
Can You Remove A Sticker And Use It Again?
Yes, many stickers can be removed and used again. Vinyl and repositionable stickers normally have the best chance of surviving. Warm the adhesive, peel slowly, store the sticker on release paper, and keep its sticky side clean. A removable replacement adhesive may help if the original glue no longer holds.
How Do You Peel A Sticker Off Without Tearing It?
Warm the sticker briefly with a hair dryer on a low or medium setting. Lift one edge with a fingernail or plastic card. Pull slowly at a low angle while supporting the sticker near the separation point. If the material stretches, curls, or separates, stop and apply gentle warmth again.