How To Make Stickers At Home: A Simple Step-By-Step Guide
Learning how to make stickers is easier than it may seem. You can design, print, protect, and cut attractive basic supplies. In this guide, we explain the materials, printer settings, cutting methods, and finishing options beginners need to make reliable stickers.
Key Takeaways
- A regular inkjet printer can produce good stickers with compatible sticker paper or printable vinyl.
- Test prints help prevent wasted ink and expensive materials.
- Laminate or a clear overlay can improve resistance to moisture, sunlight, and rubbing.
- Scissors work well for simple shapes, while cutting machines help with detailed designs and larger batches.
- Always confirm that your paper or vinyl is suitable for your printer
Table of contents
-
How To Make Stickers
-
What Do You Need To Make Stickers At Home?
-
What Is The Best Paper For Making Stickers?
-
Which App Should You Use To Design Stickers?
-
How Do You Print And Cut Stickers At Home?
-
How Can You Make Stickers Without a Printer?
-
How Can You Make Stickers Waterproof and Durable?
-
How Do You Make Stickers to Sell?
How To Make Stickers
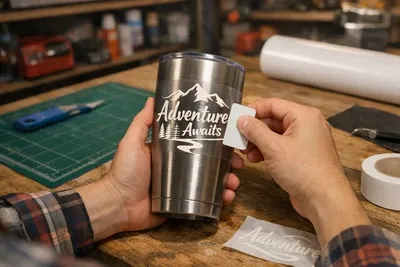
Stickers involve creating a design, printing it on adhesive material, protecting the surface, and cutting the shape. Beginners can make stickers using sticker paper, a standard printer, and scissors. Professional tools are helpful, but they are not essential for beginners. Follow the steps below when making stickers as a beginner:
- Create or select your design.
- Choose compatible adhesive paper or printable vinyl.
- Arrange the designs on a correctly sized page.
- Print a small test before using the final material.
- Allow the ink or toner to settle and dry.
- Add laminate when extra protection is needed.
- Cut around each design.
- Apply the finished sticker to a clean, dry surface.
Printed stickers use ink on an adhesive sheet. Handmade tape stickers combine paper artwork with clear tape and backing. Cut vinyl decals involve cutting colored vinyl shapes instead of printing. Each unique approach requires specific materials and a slightly different process.
What Do You Need To Make Stickers At Home?
The equipment needed for sticker making depends on the style, quantity, and intended use of the finished stickers. The essential supplies are;
- A phone, tablet, or computer: This allows you to draw, edit, resize, and arrange designs.
- Design software: A suitable program helps you prepare your artwork at the correct dimensions and resolution.
- Sticker paper or printable vinyl: This provides the adhesive backing needed to attach designs to a surface.
- A compatible printer: It transfers the artwork to the adhesive material
- Scissors or a precision knife: These tools separate the individual stickers from the printed sheet.
- A ruler and cutting mat: They support accurate cutting and protect the work surface.
Some optional upgrades include;
- Self-adhesive laminate: This protects printed surfaces against light moisture, rubbing, and fading
- A Paper Trimmer: It makes straight cuts faster and more consistent
- Shape Punches: These are useful for circles, squares, and other repeated simple shapes
- An electronic cutting machine: It can cut detailed outlines and consistent borders
- A printer calibration tool: This may improve color and cutting accuracy
- Storage sleeves: These protect finished sheets from dust, bending, and moisture.
The equipment list can feel overwhelming when you first learn how to make stickers, so start with the supplies needed for one small project. Eventually, you can upgrade when you know which materials and production methods suit your work.
Can You Make Stickers With A Regular Printer?
Most home inkjet printers produce excellent results with compatible adhesive paper or printable vinyl. You do not need a specialized machine when learning how to make a sticker at home. Compatibility matters because laser materials withstand high heat, while inkjet sheets require a coating or liquid ink. Using the wrong sheets can damage your hardware.
Always review the manufacturer's instructions for supported paper weight and feed tray settings. A rear feed tray handles thick sheets more reliably than a curved path. Testing before printing ensures high quality and saves material and time.
What Kind Of Printer Works Best For Stickers?
Inkjet printers generally reproduce photographs, gradients, and bright colors well. Laser printers print quickly and use toner that is less likely to smudge. Dedicated photo printers can produce detailed images, but their media sizes and operating cost may be the limiting factor. In the table below, we compare different printer types on color quality, material compatibility, operating cost, and ideal use;
| Printer type | Quality | Material compatibility | Operating Cost | Ideal use |
|---|---|---|---|---|
| Inkjet | Has strong color and photo detail. | Inkjet sticker paper and printable vinyl | Depends heavily on cartridge or tank cost | To craft illustrations and photo stickers. |
| Laser | Sharp text and solid graphics. | User-compatible materials only. | Often economical for repeated printing | For labels and larger batches |
| Photo printer | Used for excellent detail and smooth gradients | Usually limited to specific media type | Can be relatively high | Premium small format stickers |
The cheapest printer to purchase is not always the cheapest to operate. Compare:
- ink or toner prices
- expected page yield
- borderless printing
- media support
- replacement parts
Print a small test area before committing an expensive sheet to a full production run.
Make a strong impression with custom stickers
Work with us to create high-quality custom stickers featuring your unique branding, artwork, or message. Create professional-looking promotional products that raise awareness and appeal to your customers.
What Is The Best Paper For Making Stickers?
The best materials for making stickers depend on where the sticker will be applied and how long it needs to last. Below is a comparison of materials and their suitable uses.
| Material | Suitable uses |
|---|---|
| Matte sticker paper. | Planners, notebooks, address labels, and writable stickers. |
| Glossy sticker paper | Packaging, decorative labels, and colorful indoor designs |
| Printable vinyl | Laptops, storage containers, and frequently handled objects |
| Transparent film | Windows, glass containers, and designs that need a clear background |
| Craft sticker paper | Handmade products, rustic packaging, and natural branding |
| Weather-resistant vinyl | Outdoor signs, bottles, helmets, and exposed surfaces |
Always verify material compatibility, adhesive strength, and water resistance before buying. Some vinyl works only outdoors, while others resist splashes but not soaking. Labeling often confuses beginners who are starting to create stickers. Read the manufacturer's specifications instead of assuming that every sheet of paper performs the same way under specific conditions.
Need custom stickers for your next promotional giveaway or project?
Bring your designs to life on custom circle stickers for product packaging, event materials, branded giveaways, and personal expression, with diverse customization options available.
Explore custom sticker options hereWhich App Should You Use To Design Stickers?
The right application depends on the design you want to produce. You can use the following apps:
- Canva is accessible for arranging text, shapes, and images, as well as for using ready-made templates.
- Adobe Express is useful for quick layouts, text effects, and background removal.
- Procreate is suited to hand-drawn artwork created on a compatible tablet.
- Cricut Design Space prepares designs for printing and cutting with Cricut machines.
- Professional vector programs are useful for scalable logos, precise shapes, paths, and cutting lines.
For clear printing, design at the final size using a high resolution. Three hundred pixels per inch is ideal for detailed work. Use a transparent background so the sticker follows your artwork shape. PNG files are great for transparency, while PDF files are better for layouts. SVG files suit scalable graphics.
If you need an easy starting point, explore these editable sticker templates. Adjust the colors, text, and shapes before printing. Proper file setup ensures professional results and saves materials while making the entire process much smoother.
How Do You Print And Cut Stickers At Home?
A careful setup makes making stickers more predictable.
- Create a document that matches the size of your sticker sheet.
- Set every design to the required finished dimensions.
- Leave enough space between designs for cutting.
- Confirm which side of the material is printable.
- Load one sheet using the feed direction recommended by the printer manufacturer.
- Select the correct paper type and a suitable print quality.
- Disable automatic scaling when exact dimensions matter.
- Print a test on ordinary paper.
- Compare the test with the sticker sheet and make corrections.
- Print on the final material.
- Let the print dry before touching, laminating, or cutting it.
- Cut each shape and apply it to a clean surface.
Use scissors for simple curves, while precision knives handle detailed cuts. Paper trimmers provide straight edges, and shape punches work for repeated designs. Electronic cutters suit complex outlines. Test sheets are part of learning how to create a sticker effectively.
How To Make Stickers Without A Cricut
A Cricut is optional because stickers can be cut with scissors, a precision knife, a paper trimmer, or a shape punch.
| Factor | Manual cutting | Electronic cutting |
|---|---|---|
| Setup cost | Low | High |
| Accuracy | Depends on technique | Consistent after calibration |
| Speed | Suitable for small batches | Faster for repeated designs |
| Learning curve | Simple for basic shapes | Requires software and machine setup |
| Production volume | Best for occasional projects | Best for regular or larger batches |
A cutting machine becomes worthwhile when you need detailed shapes, even borders, repeated designs, or larger quantities. Occasional hobbyists can still produce neat results manually. Use simple outlines, rotate the paper while cutting, and make smooth continuous cuts instead of short uneven snips.
What Sticker Making Mistakes Should You Avoid?
- Printing on the backing side: Mark the printable side before loading the material.
- Using incompatible sheets: Confirm whether the product is designed for inkjet or laser printing.
- Choosing low-resolution artwork: Use a larger original file or recreate the design at the final size.
- Forgetting printer margins: Keep important artwork inside the printable area.
- Applying excessive ink: Select the correct material setting and reduce saturation when necessary.
- Cutting before the ink dries: Allow additional drying time to prevent smudges.
- Using blunt tools: Replace dull blades and use sharp scissors for clean edges.
- Trapping air under laminate: Apply the laminate slowly with a scraper or flat card.
- Applying stickers to dirty surfaces: Remove dust, oil, and moisture before application.
- Allowing laminate to end at the printed edge: Leave a small overlap to help seal the design.
Faded colors may require a higher print setting or different color adjustments. Inaccurate cuts may require calibration. Peeling edges usually indicate weak adhesive, contamination, or an unsuitable surface. Most early problems can be corrected with test prints and small setting changes.
Customize stickers with bespoke or branded designs and make an impression
Create custom square stickers with your logo, artwork, text, or other original designs. Choose from an array of customization options to meet your aesthetic and functional needs.
How Can You Make Stickers Without a Printer?
You can draw directly on adhesive paper, trace an image, attach magazine cut-outs to adhesive material, or use clear packing tape. These methods are suitable for crafts, journals, labels, and temporary decorations. A simple clear-tape method works as follows;
- Draw or cut out a small paper image.
- Place clear packing tape over the front of the image.
- Smooth the tape to remove wrinkles and air bubbles.
- Place the covered image on parchment paper.
- Cut around the image while leaving a narrow tape border.
- Peel away the parchment paper when you are ready to use it.
These homemade stickers are not designed for long-term outdoor exposure. Moisture, heat, and frequent handling can weaken the paper and adhesive.
How Can You Make Stickers For Free?
You can save money by combining free design software, your own drawings, reusable images, recycled paper, and clear tape. While free software removes design costs, physical production will still require essential materials like ink, paper, and adhesive.
Always check licenses for online images, fonts, and templates before you begin. A resource that is free for personal use may not allow profit. Create a sample before printing full sheets to ensure you avoid wasting materials.
How Can You Make A Sticker In Two Minutes?
For a quick temporary result, use a small paper design, clear packing tape, parchment paper, and scissors. Follow the steps below.
- Draw a small image or cut one from paper.
- Cover the front completely with clear tape.
- Smooth out every visible air bubble.
- Place the taped image on parchment paper.
- Cut around the design while retaining a tape border.
- Peel away the parchment backing and apply the sticker.
This method creates a simple temporary sticker. It does not produce a professionally printed or genuinely waterproof product.
Looking for an affordable solution for custom stickers?
Our online service offers a fast and reliable way to produce custom rectangle stickers with quality craftsmanship at competitive prices, including affordable options for larger quantities.
Get started with custom stickers hereHow Can You Make Stickers Waterproof and Durable?
Water-resistant stickers tolerate light splashes. Weather-resistant stickers withstand limited exposure to moisture, sunlight, and changing temperatures. A genuinely waterproof sticker should resist sustained water exposure without ink failure, separation, or loss of adhesion.
| Protection method | Suitable materials and uses |
|---|---|
| Self-adhesive laminate | Paper or vinyl stickers used on notebooks, packaging, and handled items |
| Clear vinyl overlay | Printable vinyl used on bottles, laptops, and outdoor objects |
| Spray sealant | Paper crafts and irregular surfaces when the product is compatible |
| Thermal lamination | Flat sheets that will be cut after lamination |
Sticker durability relies on ink, drying time, adhesive, and laminate application. Dye ink fades faster than pigment ink in sunlight. Extend laminate beyond printed edges to seal it properly. Always clean surfaces before application. Test one sticker against moisture and light before making a batch. Do not label stickers as waterproof without testing them under expected conditions.
How Do You Make Stickers to Sell?
A repeatable workflow helps maintain consistent quality. Below is one you can trust;
- Research the intended customer and existing products.
- Create original designs for a specific audience or use.
- Confirm commercial rights for every visual element and font.
- Print samples at the intended dimensions.
- Compare materials for color, adhesion, finish, and durability.
- Select reliable printer and cutting settings.
- Inspect every sheet before packaging.
- Store finished products away from heat, sunlight, dust, and moisture.
- Record material use, waste, labor, and packaging costs.
- Improve the process using customer feedback and production results.
Ensure all designs are your own work or licensed for commercial use. Always inspect batches for quality. When needing larger quantities, high-quality finishes, or consistent results, a custom sticker printing service offers a practical alternative to home production.
Is It Cheaper To Make Stickers At Home?
Home production can be economical for samples, prototypes, and small quantities. It may become expensive when ink, sticker paper, laminate, cutting tools, equipment maintenance, packaging, failed prints, and working time are included;
| Factor | Home production | Professional printing |
|---|---|---|
| Upfront cost | Requires supplies and possibly equipment | Usually requires only the order payment |
| Unit cost | Can be high for very small, inefficient batches | Often decreases as order quantity rises |
| Quality control | Direct control over each sheet | Controlled through provider specifications |
| Turnaround time | Immediate when supplies are available | Includes production and delivery time |
| Order quantity | Flexible for individual sheets | Usually more economical for larger quantities |
Calculate the cost of each usable finished sticker. Include wasted prints and production time, rather than dividing only the paper price by the number of designs per sheet. This gives a more realistic comparison between home production and professional printing.
Frequently Asked Questions About How To Make Stickers
How Do You Make Stickers At Home?
Create or select a design, then arrange it on your page and print using compatible adhesive paper or printable vinyl. Allow the ink to dry, add protective laminate if necessary, and cut around your design shapes. Finally, apply your sticker to surfaces.
Can You Make Stickers With A Regular Printer?
Most home inkjet printers can create stickers when using compatible sticker paper or printable vinyl. Some laser printers also work with suitable materials. Before printing, verify your printer supports the paper thickness, weight, and quality settings for your chosen sheets.