How To Make Vinyl Stickers: At Home With A Regular Printer
Learning how to make vinyl stickers is easier than it seems. In this guide, you will discover how, with printable vinyl, a regular printer, basic design software, and scissors or a cutting machine, you can produce personalized stickers for notebooks, packaging, bottles, gifts, and other smooth surfaces.
Key Takeaways
- Choose printable vinyl that is compatible with your printer.
- Prepare artwork at the correct size and about 300 DPI.
- Print a test page before using vinyl.
- Let the ink dry before laminating or cutting.
- Laminate stickers that may face moisture or frequent handling.
Table of contents
-
How To Make Vinyl Stickers
-
What Do You Need To Make Vinyl Stickers At Home? (H2
-
How Do You Design Vinyl Stickers At Home?
-
How Do You Print Your Own Vinyl Stickers At Home?
-
What Is The Best Way To Cut Vinyl Stickers?
-
What Common Vinyl Sticker Mistakes Should You Avoid?
-
How Do You Make Vinyl Stickers Last Longer And Resist Water?
-
Is It Cheaper To Make Your Own Vinyl Stickers?
How To Make Vinyl Stickers
Vinyl stickers are created by printing digital designs onto printable vinyl sheets. After optionally adding laminate, you cut around the designs and peel them from the back. As a beginner learning how to make your own vinyl stickers, use simple scissors instead and follow the process below:
- Create or upload your digital design.
- Arrange the artwork on a document matching the vinyl sheet size.
- Load compatible printable vinyl into your printer.
- Print the designs using high-quality settings.
- Let the ink dry completely.
- Apply laminate if the stickers need extra protection.
- Cut around each design.
- Peel away the backing and apply the sticker.
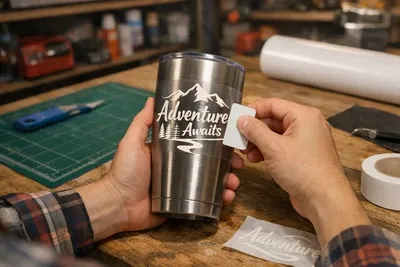
You do not need expensive equipment to make your own vinyl stickers. Simple designs only require a printer and scissors, though a cutting machine helps with detailed edges and consistency. Printed stickers use ink, whereas cut vinyl decals are shaped from colored adhesive sheets. Professionally produced custom transfer stickers use tape to keep elements aligned during application.
What Do You Need To Make Vinyl Stickers At Home? (H2
You only need a few essential materials to begin making vinyl stickers. Laminate, an electronic cutter, and professional design software are useful but optional. Below are the items you need and their purposes;
| Item. | Purpose. |
|---|---|
| Printable vinyl | Provides the printable surface and adhesive backing |
| Compatible printer | Print the design onto the vinyl. |
| Design software. | Creates, sizes, and arranges artwork. |
| Scissors or craft knife. | Cut stickers from the sheet. |
| Cutting mat | Protect surfaces during manual cutting. |
| Electronic cutter | Cut detailed shapes consistently. |
| Scraper or card | Smooths laminate and removes bubbles. |
| Clear laminate | Protects ink from scratches and moisture. |
| Test paper. | Checks sizing and layout before printing. |
Essential items include:
- Printable vinyl
- A compatible printer
- Design software
- A cutter
Use a mat for weeding and laminate for protection. Always check packaging to ensure your vinyl matches your printer type, as incompatible materials can cause poor results.
Which Printable Vinyl Should You Use For Stickers?
Selecting the ideal printable vinyl depends on your intended application and the environment where your stickers will be used. Each material offers unique finishes and distinct properties that affect both durability and aesthetics. The following options detail the specific characteristics of common vinyl types to help you choose the most compatible material for your project:
- Matte printable vinyl minimizes glare and suits indoor labels, planners, or notebooks.
- Glossy vinyl makes colors appear richer, which is ideal for decorative stickers.
- Clear vinyl makes surfaces visible, though it is desired to remain transparent in the white area.
- Removable vinyl suits temporal items, while permanent vinyl produces stronger adhesion for frequent handling.
- Water-resistant vinyl may suit damp areas, depending on your ink and laminate.
- Printable vinyl differs from craft vinyl, which is normally cut into solid shapes.
Always read the manufacturer's instructions for printer compatibility and drying times. Testing a finished sticker on its intended surface helps you evaluate print quality and adhesive strength.
Do You Need To Laminate Vinyl Stickers?
Laminate is optional when you create vinyl stickers for dry indoor uses like notebooks, drawers, or gift wrapping. It becomes valuable when projects face moisture, scratching, or frequent handling.
Self-adhesive sheets are convenient, as they do not require heat, while cold roll options often provide smoother coverage. Clear protective sprays are another option, though their durability varies significantly between available brands.
Home lamination does not guarantee a sticker is waterproof. Water can still seep through edges or affect the adhesive backing. For frequently handled items like water bottles, combine laminate with sealed edges and testing. An unlaminated sticker may perform well in dry, low-traffic areas, but you should prioritize protection for durable applications.
Make a strong impression with custom vinyl stickers
Turn your artwork into custom vinyl stickers for packaging, notebooks, gifts, and promotional giveaways. Choose a shape that complements your design and let us handle the printing and cutting.
How Do You Design Vinyl Stickers At Home?
You can create your own vinyl stickers using Canva, Adobe Illustrator, Procreate, QuickDesign, Space, or similar software. Select a program that allows control over artwork dimensions and use high-quality graphics at 300 DPI, as enlarging small files usually results in pixelation.
Choose readable text and ensure high contrast between your design and background. Removing backgrounds allows stickers to easily follow object outlines. Adding an offset or white border simplifies cutting. Professionally produced custom shape sticker options demonstrate how designs follow distinctive, clean outlines.
Wider borders are especially beneficial for manual cutting. Arrange designs on a single page, ensuring enough space exists between them to facilitate clean cutting. Confirm final document dimensions before exporting your file to ensure optimal print accuracy and success.
How Do You Turn A Picture Into A Vinyl Sticker?
To create a vinyl sticker from a photograph, start with the highest resolution file available. Use editing tools to remove the background and clean up any stray pixels around hair or clothing. Once clear, resize the image to your desired dimensions and add a white or colored offset. This creates a helpful cut line that protects intricate design details during the cutting process.
Arrange your image within a print and cut document, leaving ample space between designs. Avoid low-resolution screenshots, which often appear pixelated. Always ensure you have permission to use any artwork or logos. Copyright restrictions apply, so verify your rights before printing your final project.
Can You Make Vinyl Stickers With A Regular Printer?
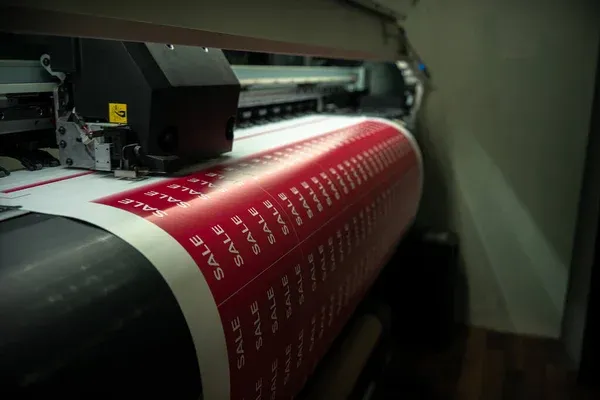
Many printable vinyl sheets work with standard home inkjet printers if the material is explicitly designed for inkjet use. You must always match the vinyl to your specific printer type. Laser printers require heat-tolerant, laser-compatible vinyl to function correctly. Never place inkjet-only vinyl into a laser printer, as high temperatures can damage the coating or adhesive.
Most home printers cannot produce white ink. On clear vinyl, designs remain transparent, making pale colors difficult to see on dark surfaces. Home printers also have practical limitations. Ink is expensive, printed colors may differ from your screen, and images might fade after prolonged sunlight exposure. Despite these constraints, regular printers remain excellent tools for beginners.
Need custom vinyl stickers for your next promotional giveaway?
Bring your branding to life with custom kiss-cut vinyl stickers that are easy to peel and distribute. Personalize them with your logo, artwork, or message for events, customer orders, and creative projects.
Custom stickers with our service hereHow Do You Print Your Own Vinyl Stickers At Home?
Follow these steps when creating vinyl stickers with a regular printer;
- Print the layout on ordinary paper first.
- Check the size, spelling, margins, colors, and spacing.
- Identify the printable face of the vinyl.
- Determine how your printer feeds the sheet.
- Load one vinyl sheet and adjust the paper guides.
- Select high-quality or photo print settings.
- Choose the recommended paper type.
- Turn off scale to fit and other automatic resizing settings.
- Print the sheet and place it on a clean surface.
- Let the ink dry before touching, laminating, or cutting it.
A paper test prevents wasted vinyl and reveals sizing problems early. Feed one sheet at a time if the material is thick or your printer struggles to separate multiple sheets.
How Do You Laminate Printed Vinyl Stickers?
Follow the steps below to laminate printed vinyl stickers;
- Cut the laminate slightly larger than the printed area.
- Peel back a narrow section of its backing.
- Align the exposed edge with the vinyl sheet.
- Press that edge down gently.
- Pull away the backing gradually.
- Smooth the laminate with a scraper, card, or squeegee.
- Push remaining bubbles toward the nearest edge.
Work slowly from one side of the sheet to the other. If the laminate wrinkles or becomes misaligned, stop immediately. Carefully lift the unattached portion and reposition it. Lifting fully bonded laminate may stretch the vinyl or damage the print.
What Is The Best Way To Cut Vinyl Stickers?
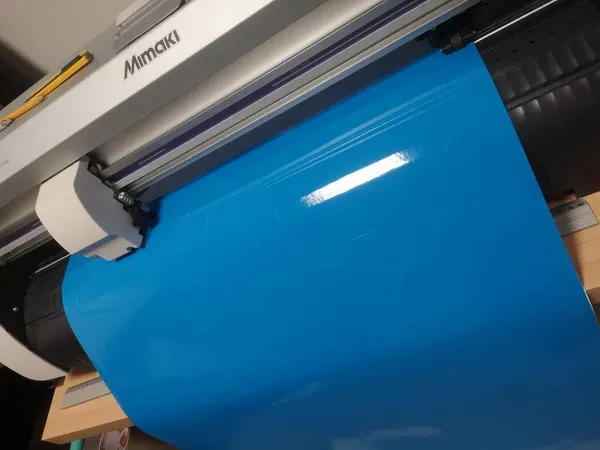
Kiss cutting passes through the sticker material while leaving the backing intact. This creates a sheet from which individual stickers can be peeled. Die cutting passes through both the vinyl and backing, producing separate stickers shaped around the designs. Professionally produced custom kiss-cut stickers demonstrate the first format.
Scissors suit simple shapes like circles, while craft knives offer precision for corners. Electronic cutters work fastest for detailed designs. Select your tool based on the overall complexity of your artwork and the total volume of stickers you need to produce.
Always use material settings recommended for your printable vinyl. Adjust blade depth, pressure, and speed to match your material thickness. Perform a test cut to ensure the blade pierces the sticker but leaves the backing sheet intact.
Can You Cut Vinyl Stickers By Hand?
You can make a vinyl sticker using sharp scissors or a craft knife. Print designs with generous borders, then rotate the sheet while cutting for better control. Continuous motions create cleaner edges than short cuts. Simple shapes like circles and squares are easiest to cut manually.
Cricut is not your only option. Machines like Silhouette, Brother ScanNCut, and Siser also process printed sticker sheets. Hand cutting remains affordable for occasional projects, but digital cutters improve speed and consistency for higher volumes. Choose the method that best aligns with your budget needs.
Customize vinyl stickers with branded designs that make an impression
Give your logo, illustration, or message a clean layout with custom rectangle vinyl stickers. Choose your dimensions and a glossy or matte finish to create a look that fits your brand.
What Common Vinyl Sticker Mistakes Should You Avoid?
The table below shows common mistakes you should avoid when handling vinyl stickers and the solutions to these errors;
| Mistake | Solution |
|---|---|
| Printing on the backing | Identify the printable side first |
| Using incompatible vinyl | Match the material to the printer |
| Touching wet ink | Let the sheet dry completely |
| Using blurry artwork | Prepare artwork at about 300 DPI |
| Allowing automatic scaling | Print at actual size |
| Forgetting registration marks | Enable the marks before printing |
| Applying excessive pressure | Test and reduce the blade pressure |
| Laminating over dust | Clean the working area |
| Cutting too close | Add an offset around the design |
| Skipping the test print | Check the layout on plain paper |
Registration marks must remain clear and within the required area. Glossy laminate may reflect the scanner light on some cutting machines. Follow the machine instructions for scanning glossy materials.
Looking for an affordable way to order custom vinyl bumper stickers?
Skip the home printing and cutting with professionally printed vinyl bumper stickers. Explore sizes, finishes, and quantity pricing to find an option that suits your campaign and budget.
Custom stickers with our service hereHow Do You Make Vinyl Stickers Last Longer And Resist Water?
Durable vinyl sticker making depends on the vinyl, ink, laminate, adhesive, application surface, and environment. Follow these tips to make them last longer;
- Choose vinyl intended for the expected conditions.
- Use compatible ink and let it dry fully.
- Laminate stickers exposed to moisture or scratching.
- Clean and dry the application surface.
- Apply the sticker at a suitable temperature.
- Let the adhesive bond before exposing it to water.
- Avoid dishwashers unless the sticker has been tested for them.
- Test the sticker against water, scratches, and sunlight.
Water-resistant stickers may tolerate splashes and gentle wiping. Waterproof and weatherproof products must withstand more demanding conditions. These include rain, prolonged moisture, temperature changes, sunlight, and abrasion. Test finished stickers realistically before using them outdoors or selling them with durability claims.
How Can You Apply A Vinyl Sticker And Keep It Bubble-Free?
Clean your application surface to remove dust or oil that weakens adhesive. Position the sticker before removing the backing. Peel a small section to attach one edge, then pull the backing away gradually while smoothing the sticker from the center outward to ensure a smooth finish.
Use a card or scraper for larger designs, applying steady pressure without scratching or stretching the sticker. Smooth surfaces like glass or metal provide reliable adhesion. Avoid textured or oily surfaces, which reduce durability.
Is It Cheaper To Make Your Own Vinyl Stickers?
Home production is economical for small batches and personalized designs, especially if you already own a printer. When calculating your actual costs, include expenses for printable vinyl, laminate, ink, cutting mats, blades, test prints, and electricity. If you purchase new equipment specifically to make custom vinyl stickers, factor a portion of those costs into your analysis.
Divide your total expenses by the final count of usable stickers, not the initial goal. Damaged prints and failed test cuts increase the true cost per piece. Home production suits small, highly customized projects best. Professional printing often provides lower unit prices, consistent results, and less personal labor for large orders, making it advantageous.
Frequently Asked Questions About How To Make Vinyl Stickers
What Is The Easiest Way To Make Vinyl Stickers At Home?
Design simple shapes, print them on inkjet-compatible vinyl, and cut with scissors once dry. Add self-adhesive laminate if they need extra protection. This simple approach is a practical introduction to how to create vinyl stickers.
How Do You Make Vinyl Stickers Without A Cricut?
Print your designs and cut them with scissors or a craft knife. You can also use a Silhouette, Brother ScanNCut, Siser, or another compatible cutter. A Cricut is helpful, but not required when learning how to make vinyl stickers.