How To Make Holographic Stickers: At Home Step By Step
Learning how to make holographic stickers at home is easier than it seems. You can produce colorful reflective stickers at home with a regular printer. Suitable sticker sheets, holographic laminate, and cutting tools. In the article, we show you how it is done

Key Takeaways
- You can make holographic stickers with printable holographic paper or ordinary sticker paper covered with holographic laminate.
- Many home inkjet printers work well when the sticker material is inkjet compatible.
- Let printed ink dry completely before applying laminate or cutting the sheet.
- A Cricut is helpful for precise cutting, but scissors or a craft knife can also work.
- Test the material before describing homemade stickers as waterproof or suitable for outdoor use.
Table of contents
How To Make Holographic Stickers
You can make holographic stickers by printing artwork directly on printable holographic sticker paper or by covering printed sticker paper with self-adhesive holographic laminate. Design the artwork, print a test sheet, allow the ink to dry, apply laminate if required, cut each sticker, and test the finished result before regular use.
- Create your artwork in suitable design software.
- Set the sticker size, cut border, spacing, and bleed.
- Print a draft on ordinary paper to check the layout.
- Load compatible sticker paper into the printer.
- Print the design using an appropriate quality setting.
- Leave the printed sheet untouched until the ink has dried completely.
- Apply holographic laminate if you printed on ordinary sticker paper.
- Cut the stickers with scissors, a craft knife, or a cutting machine.
- Peel one sticker carefully and inspect the edges and adhesive.
- Test it on a clean surface and check its resistance to handling and moisture.
Commercial equipment is not essential for making holographic stickers at home. A regular inkjet printer, compatible paper, scissors, and patience may be enough. The best method depends on your printer, preferred reflective effect, available tools, budget, and required water resistance.
How To Make Holographic Stickers At Home?
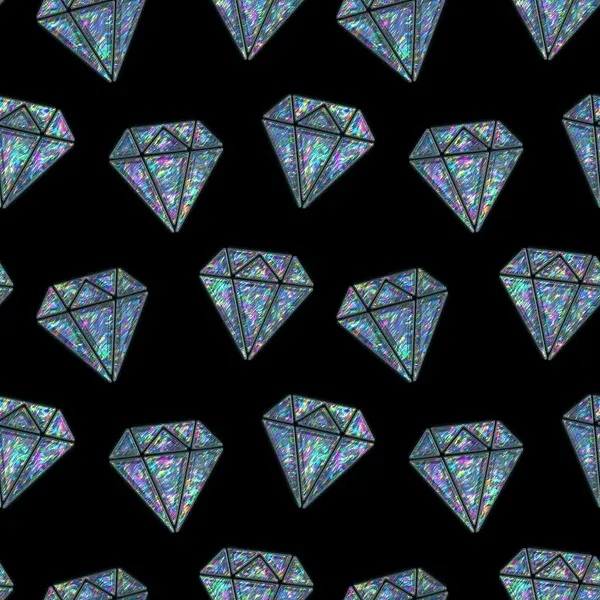
The simplest approach to diy holographic stickers uses ordinary printable sticker paper and self-adhesive holographic laminate. Follow the steps below to do it yourself;
- Prepare a simple design and place it on a page with enough space around every sticker.
- Print a draft on ordinary paper and confirm the dimensions, spelling, margins, and orientation.
- Load the printable sticker paper with the correct side facing the print head.
- Print one small test design using the recommended printer settings.
- Place the printed sheet on a clean flat surface and let the ink dry fully.
- Clean your hands and remove any dust from the sheet.
- Align the holographic laminate before exposing much of its adhesive.
- Peel back a small section of the liner and attach one edge.
- Smooth the laminate gradually across the printed sheet.
- Cut around each design while leaving the intended border.
- Peel and test one sticker before using the remaining material.
Never laminate while ink feels damp; wet ink may smudge or transfer onto the adhesive. Avoid touching the printed surface, as fingerprints often remain visible beneath the laminate.
The first attempt is tricky. Always make one test sticker first; this helps you practise alignment and check quality without wasting material.
Which Holographic Sticker Method Should You Choose?
Two common methods are available when learning how to make holographic stickers; they are explained in the table below;
| Feature | Direct printing on holographic paper | Printed sticker paper with holographic laminate |
|---|---|---|
| Difficulty | Simple when the printer accepts the material | Requires careful laminate alignment |
| Equipment | Printer and cutting tool | Printer, cutting tool, laminate, and smoothing tool |
| Design control | The effect appears beneath printed areas | The effect sits across the printed design |
| Cost | Fewer separate materials are needed | Individual materials may increase the cost |
| Durability | Depends on the paper and ink | Laminate can improve scratch and splash resistance |
| Appearance | Strong all-over rainbow surface | Pattern appears over the printed colors |
Direct printing is convenient; it creates a visible rainbow surface beneath your ink, though colors may look less vibrant due to light reflection. Alternatively, ordinary white sticker paper yields stronger printed colors; adding laminate provides a reflective overlay and extra protection. Choose this method if color clarity is your priority.
Can You Sell Holographic Stickers Made At Home?
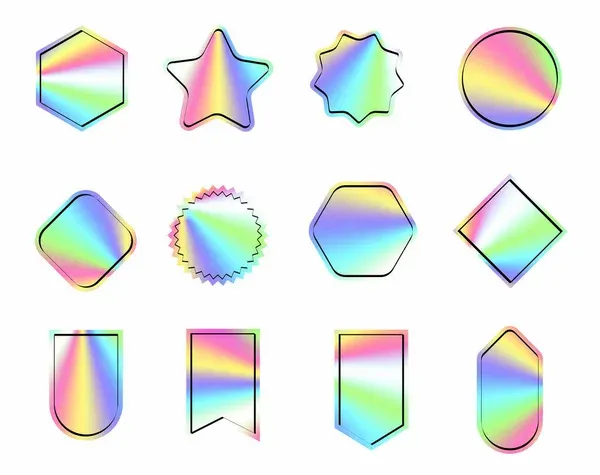
You can sell homemade holographic stickers if you own the artwork or have permission to use every protected element. This includes illustrations, characters, logos, fonts, photographs, patterns, and commercial design assets.
A useful product listing should state the following information;
- Exact sticker dimensions.
- Base material and adhesive type.
- Holographic pattern and surface finish.
- Whether the sticker is water-resistant or waterproof.
- Expected indoor or outdoor durability.
- Recommended surfaces and cleaning instructions.
Calculate all costs, like materials and fees, before pricing your stickers. Always photograph finished products from various angles and under different lights to showcase the unique, shifting holographic effects.
Make a strong impression with custom holographic stickers
Give your branding a rainbow finish with custom holographic stickers featuring your logo or artwork. Create memorable additions to product packaging, customer gifts, and promotional giveaways.
What Materials Do You Need To Make Holographic Stickers?
The essential materials for how to make a holographic sticker are listed below;
- A computer or tablet.
- Design software.
- An inkjet or laser printer.
- Printer-compatible sticker paper.
- Holographic laminate when using ordinary sticker paper.
- Scissors, a craft knife, or another cutting tool.
- A clean and flat working surface.
Optional equipment like cutting machines, scrapers, and clear laminate can enhance your project; having these tools ready makes the process easier. Using the right surface material is also crucial. Glossy sheets offer shine, while matte sheets reduce glare for photography. Printable vinyl is excellent for durability, whereas paper sheets are affordable for indoor items.
Always check compatibility before purchasing materials. Inkjet and laser printers function differently; using the wrong paper can damage your machine or lead to poor print quality.
Should You Use Holographic Paper Or Holographic Laminate?
Holographic sticker paper is a printable sheet with adhesive on the back and a reflective surface on the front. Holographic laminate is a thin transparent adhesive film placed over a separately printed sticker sheet.
| Feature | Holographic sticker paper | Holographic laminate |
|---|---|---|
| Printability | Must match the printer type | Applied after printing |
| Color vibrancy | Colors may look lighter | White paper can support stronger colors |
| Application difficulty | No separate film application | Careful alignment is required |
| Durability | Varies by product | Can add scratch and splash resistance |
| Flexibility | Fast and convenient | Works with several base materials |
| Appearance | Effect appears beneath the ink | Effect appears over the artwork |
Use holographic paper when convenience and a strong rainbow background are priorities. Use laminate when you want bold printed colors, a protective top layer, or more control over the pattern. Your final choice should account for printer compatibility, artwork style, cost, experience, and intended use. Always follow the instructions supplied by the paper or laminate manufacturer.
How Do You Apply Holographic Laminate Without Bubbles?
Follow the steps below to apply holographic laminate without bubbles;
- Wash and dry your hands.
- Clean the work surface and remove dust from the printed sheet.
- Place the laminate over the sheet without exposing the adhesive.
- Confirm that every printed design will be covered.
- Peel back a small strip of the liner.
- Attach the exposed edge and check the alignment.
- Smooth the laminate forward while slowly removing more liner.
- Push trapped air toward the nearest outer edge.
- Inspect the sheet before cutting.
To apply holographic laminate, first clean your workspace and sheet. Attach one edge; use a scraper or cloth to press firmly while slowly peeling the backing. Work steadily across the surface to push out air bubbles. If small bubbles appear, gently lift the film to smooth them; avoid removing the full backing at once to prevent misalignment or folding.
Are Homemade Holographic Stickers Waterproof?
A holographic finish does not automatically make a sticker waterproof; resistance depends on the base material, ink, adhesive, and laminate application. Do not use the terms water-resistant and waterproof interchangeably. Water-resistant stickers tolerate light splashes; conversely, waterproof stickers endure demanding exposure without ink bleeding or adhesive failure.
Printable vinyl and laminate improve resistance to splashes and fading, but water can still enter through unsealed edges. Always test a finished sticker against water, sunlight, and temperature changes for several days. Test thoroughly before placing stickers on bottles, vehicles, or outdoor gear.
Need custom holographic stickers for your next promotional giveaway or project?
Bring your designs to life with custom holographic stickers for personal expression, branding, or event giveaways. Choose a size and design that suit your project and give recipients something worth displaying.
Explore options for custom holographic stickersHow Should You Design A Holographic Sticker?
You can create holographic stickers using design programs like Canva, Procreate, or Adobe Illustrator. Begin by determining your sticker dimensions; adding a cut border around your artwork helps keep minor cutting variations less noticeable. It is important to extend background colors into a bleed area beyond your cut line. If you prefer parts of the holographic paper to show through, use a transparent background in your design file.
Leave sufficient space between each sticker to ensure safe cutting; narrow gaps often cause borders to overlap or leave too little material. Keep your designs relatively simple, as fine details or thin lettering can be difficult to see through a reflective finish. Print a draft on ordinary paper to check the sizing, margins, and quality before committing to expensive holographic materials.
Which Colors Look Best On Holographic Stickers?
Use black, dark outlines, white areas, and bold shapes for your holographic stickers; these high-contrast designs remain visible against the rainbow background. Strong outlines effectively separate your artwork from the pattern. Avoid pale colors or narrow lettering, as these often disappear under reflected light.
Try using transparent or lightly printed sections; this lets the holographic material shine and integrates the effect into your design. Always test prints under different lighting. Designs appear different on screen versus on reflective material, so comparing daylight and artificial-light results is essential.
How Do You Print Holographic Stickers Cleanly?
Process below to print holographic stickers cleanly;
- Confirm the sheet size and document size before printing.
- Choose the correct portrait or landscape orientation.
- Select the paper type recommended by the manufacturer.
- Use best or high-quality printing when the coating can accept the additional ink.
- Print at actual size unless scaling is necessary.
- Check border settings and keep designs within the printable area.
- Run one test before printing a complete sheet.
- Leave the ink to dry according to the material instructions.
Excessive ink can pool or smudge on coated surfaces. If this happens, try a different paper setting or reduce the print quality by one level. Do not touch, stack, laminate, or cut the sheet until the ink is completely dry.
What Kind Of Printer Do You Need For Holographic Stickers?
Many home inkjet printers are capable enough to make your own holographic stickers when you pair them with compatible sticker paper. You do not need to invest in a specialized holographic printer for your home projects. The key is simply selecting paper designed for your specific ink type.
Laser printers have different requirements: they necessitate laser-compatible sheets because they use heat. Always check your manual for advice on thick media support. Features like rear paper feeding help sheets move through the printer without bending.
Customize holographic stickers with your artwork and make an impression
Turn your logo, illustration, or branded design into custom holographic stickers with a distinctive reflective finish. Share your preferred effect to help us achieve the look you have in mind.
How To Make Holographic Stickers With A Cricut?
A Cricut cuts the printed designs but does not replace the printer during Print Then Cut projects. The full process is as follows;
- Upload the artwork into Cricut Design Space.
- Set the correct design size.
- Flatten the printable layers.
- Add an offset to create a clean sticker border.
- Select Print Then Cut.
- Send the page to a compatible home printer.
- Allow the ink to dry completely.
- Apply holographic laminate without covering areas needed for registration when possible.
- Place the sheet straight on a clean cutting mat.
- Load the mat into the Cricut.
- Select the closest material setting.
- Perform a small test cut and adjust the pressure if necessary.
- Cut the complete sheet after confirming that the blade passes through the intended layers.
Holographic reflections can sometimes interfere with registration sensors. Reducing direct light or placing matte tape over highly reflective registration areas may reduce glare. Do not cover or distort the printed registration marks.
Looking for an easy way to order custom holographic stickers?
Skip the home printing, laminating, and cutting. Send us your artwork and choose your sticker specifications to create custom holographic stickers for your business, event, or personal project.
Get started with custom holographic stickersWhat Mistakes Should You Avoid When Making Holographic Stickers?
Avoid the following when making holographic stickers;
- Using incompatible material: Check whether every sheet is intended for inkjet or laser printing.
- Printing on the wrong side: Identify the printable surface before loading the sheet.
- Forgetting the bleed: Extend background colors beyond the cut line.
- Laminating wet ink: Allow enough drying time to prevent smearing.
- Touching the printed surface: Hold sheets by their edges to avoid fingerprints.
- Working around dust: Clean the table, tools, and printed sheet before laminating.
- Removing the entire laminate liner: Expose a small section and smooth the film gradually.
- Applying uneven pressure: Work from one edge and push air outward.
- Choosing the wrong cutting setting: Test the blade and pressure on a small area.
- Ignoring registration glare: Reduce reflections around cutting machine sensor marks.
- Assuming every product is waterproof: Test the finished sticker before making durability claims.
- Using unsuitable stickers outdoors: Confirm resistance to sunlight, moisture, heat, and temperature changes.
Frequently Asked Questions About How To Make Holographic Stickers
How Do You Make Holographic Stickers At Home?
If you’re learning how to make hologram stickers, you need to know how to create a design, print it on compatible sticker paper, let the ink dry, apply holographic laminate if needed, and cut around the artwork. Test one sticker before producing a complete sheet. This process can be completed with a home printer and basic cutting tools.
Can You Make Holographic Stickers Without A Cricut?
Yes. You can make holographic stickers without a Cricut by cutting them with scissors, a craft knife, a ruler, and a cutting mat. Scissors work well for circles and simple shapes. A craft knife offers more control for straight edges and detailed designs. Cut slowly and keep the border consistent.