How To Sublimate A Tumbler: A Step By Step Guide For Beginners
Learning how to sublimate a tumbler is easier when you understand the supply settings, design prep, and pricing steps. This guide explains the full process in simple terms so beginners can make clean, vibrant, and long-lasting tumblers with fewer mistakes.
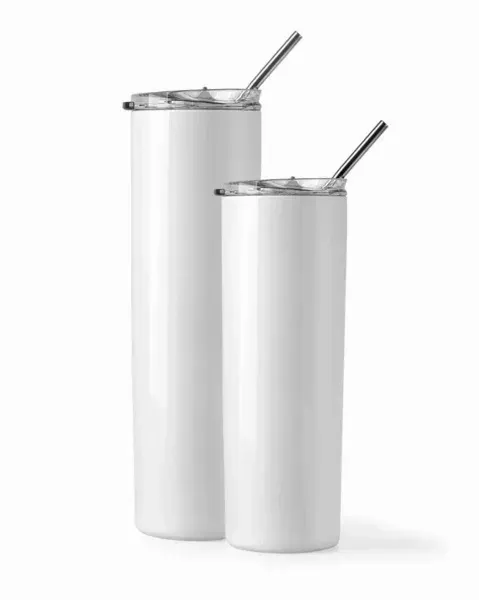
Key Takeaways
- Use only sublimation-ready tumblers with the correct polymer coating.
- Prepare your design at the right size before printing.
- Secure the transfer tightly to prevent ghosting.
- Use the right heat, time, and pressure for your equipment.
- Let the tumbler cool before peeling the paper.
How To Sublimate A Tumbler The Right Way
Tumbler sublimation is an advanced printing process that uses intense heat to transform sublimation ink into a gaseous state. This gas bonds permanently with a special polymer coating found on the tumbler surface. Once it cools, the design becomes an integral part of the tumbler material rather than sitting on top of its adhesive. This process creates high-quality products that do not peel or fade when completed correctly.
This is why sublimation on tumblers is incredibly popular with many crafters and small business owners. It creates bright, vivid prints, smooth finishes, and highly detailed designs. This guide covers the essential supplies, design setup, and wrapping process to ensure your projects achieve professional, durable, and consistent outcomes every time.
Browse a curated selection of sublimation-ready tumblers and starter kits available through our website to get the best possible results from the very first press
Make a strong impression with custom stainless steel tumblers
Work with us to create high-quality custom stainless steel tumblers with your unique branding to raise awareness and ensure professional-looking promotional products that your customers or clients will love.
What Supplies Do You Need To Sublimate A Tumbler?
Before making any sublimation tumblers, gather the right tools. The quality of your supplies directly affects color, sharpness, alignment, and durability. Below is a table of supplies and their uses to consider when sublimating a tumbler
| Supply | Purpose | Essential or optional |
|---|---|---|
| Sublimation printer | Prints the design with sublimation ink | Essential |
| Sublimation ink | Turns into gas and bonds with the coating | Essential |
| Sublimation paper | Holds the ink before heat transfer | Essential |
| Sublimation-ready tumbler | Does the coating needed for bonding | Essential |
| Heat press or oven | Applies heat and pressure | Essential |
| Heat-resistant tape | Holds the design in place | Essential |
| Butcher paper | Protects the equipment | Recommended |
| Heat gloves | Helps handle hot tumblers safely | Recommended |
| Lint roller | Removes dust before pressing | Recommended |
| Shrink wrap | Helps with oven pressing | Optional |
The answer to what you need to sublimate a tumbler is a coated tumbler, a printer, ink, paper, and a heat source. These are essential supplies. Optional tools like rollers, paper, gloves, and shrink wrap improve consistency and safety but are not required for starting.
Beginners asking what they need to make sublimation tumblers should start with a simple kit from a reliable supplier. Once experienced, you can purchase blanks, ink, and paper in bulk to lower costs and manage your craft projects efficiently as you grow.
What Makes A Tumbler Ready For Sublimation?
A sublimation-ready tumbler needs a polymer coating to bond with ink. It locks designs onto the surface. Without it, the ink will not bond. Regular steel lacks this coating. If you try sublimation on a tumbler without it, the design may fail. Always check listings for polymer-coated items, avoiding plain tumblers unless the seller confirms they are suitable for sublimating tumblers.
You cannot use any container. Sublimation on tumbler surfaces works only with correct coatings. Stainless steel is standard. Avoid plastic, as it rarely handles heat. Choosing quality blanks is the best way to sublimate tumblers, creating durable designs.
Can You Sublimate On Any Tumbler Safely?
You cannot use just any container. Sublimation on tumbler surfaces works only when the item features the correct polymer coating to bond with ink under high heat. Stainless steel is the industry standard, while glass works if specifically heat-rated. Avoid standard plastic, as it rarely handles these temperatures safely.
If you are uncertain, test a small design on a hidden area first. If the image is dull or wipes away, the item is not suitable. Choosing quality blanks is the best way to sublimate tumblers while ensuring your final designs remain vibrant, sharp, and durable.
How Do You Sublimate A Tumbler From Start To Finish?
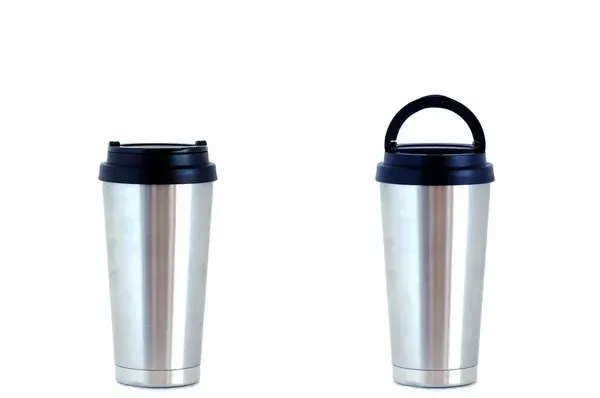
The complete process follows a clear order. Each step matters because sublimation ink is permanent once pressed;
- Choose a sublimation-ready tumbler.
- Measure the tumbler and prepare the design.
- Print the design on sublimation paper.
- Mirror the design before printing.
- Clean the tumbler with a lint roller.
- Wrap the design tightly around the tumbler.
- Tape the transfer securely.
- Press with the correct time, temperature, and pressure.
- Let the tumbler cool.
- Remove the paper carefully.
Mastering the step-by-step sublimation tumbler workflow takes practice, as beginners may initially face challenges with pressure or color settings. Proper preparation is essential to making the process easier, so ensure your supplies are organized and ready before you begin to make sublimation tumblers.
How Do You Prepare A Design For Tumbler Sublimation?
Begin by measuring the height and circumference of your tumbler, as dimensions vary by supplier. Use design software to set these exact measurements. Create high-resolution artwork to ensure the final print remains sharp and clear. Low-quality files often look blurry or pixelated, so always prioritize quality for professional results.
Remember that screen colors look brighter than printed ink before heat is applied. Always mirror the design before printing. This is one of the most important sublimation tumbler instructions because it ensures text and images appear correctly on the final piece. Carefully checking these details prevents common design mistakes.
How Do You Wrap And Transfer A Design Onto A Tumbler?
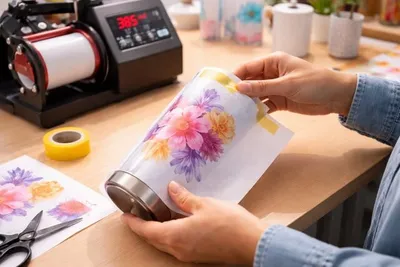
Wrap the printed paper tightly around your tumbler, ensuring the design contacts the coated surface without gaps or loose areas. Use heat-resistant tape along the seam and edges. Precise alignment is essential, as the wrap must sit straight to ensure the final print is perfectly positioned. Proper placement at this stage is the best way to achieve consistent results.
Apply even pressure during heating to avoid pale spots or patchy designs. Once pressed, let the tumbler cool before handling. Peel the transfer paper in one smooth motion, avoiding any sliding to prevent ghosting. Careful handling ensures a professional, vibrant finish.
What Temperature Should You Use To Sublimate A Tumbler?
Most sublimation tumblers require temperatures between 350 and 400 degrees Fahrenheit, although the exact settings always depend on the specific coating, equipment, and manufacturer's instructions. Insufficient heat leads to faded colors and incomplete transfers, while excessive heat scorches the surface or browns your design. When you are learning how to do tumbler sublimation, you should start with the supplier’s recommended settings. Always test and adjust these critical variables carefully to ensure your final colors and seams appear perfect and crisp.
Need custom stainless steel tumblers for your next promotional giveaway or other project?
We can bring your designs to life on custom stainless steel tumblers for personal expression, branding, employee gifts, customer appreciation, or other promotional purposes, offering diverse customization options to make a lasting connection.
Explore options for custom stainless steel tumblers hereBest Equipment To Use For Sublimating Tumblers
Choosing between a heat press and a sublimation oven depends on your workflow. A press offers direct pressure, ideal for single items and beginners in small spaces. It is fast and offers control. Conversely, an oven heats the item from all sides, requiring shrink wrap. This is perfect for batches. Regardless of the tool, consistent heat distribution is critical because uneven temperatures make sublimating a tumbler difficult, as colors may vary.
Equipment choice impacts results. While presses offer speed, ovens provide versatility. Larger shops often select equipment for multiple items. Always prioritize even heat to maintain quality. Proper tool selection streamlines your workflow and ensures consistent outcomes. Monitoring heat helps you achieve professional results. Quality equipment ensures your prints remain crisp.
How Long Should You Press A Tumbler For Sublimation?
Press duration depends on the Tumbler type, which determines your Common temperature and Common time. A 20 oz tumbler takes 60 to 90 seconds, and a 30 oz tumbler takes 90 to 120 seconds. Ovens with shrink wrap require 5 to 7 minutes at 375 to 400 degrees. Follow supplier settings for glass tumblers.
Time and heat work together to produce results. Lower temperatures require more time, while higher temperatures need less. Insufficient pressing causes pale prints, and excessive heat may scorch the finish. Always adjust settings carefully for quality. The safest approach to the sublimation tumbler tutorial is to test one blank first.
How Do You Sublimate A Tumbler With A Heat Press?
To use a tumbler heat press, preheat your machine and set the timer. Adjust pressure so the tumbler fits snugly without forcing it closed. Clean the surface, wrap your design tightly, and tape every edge securely. Use butcher paper if needed. Press according to settings, rotating if necessary for full coverage. Remove with heat gloves and allow it to cool.
Common mistakes like weak pressure, loose paper, or wrong temperatures can ruin how to do a sublimation tumbler, even with quality designs. Explore high-quality equipment to ensure consistent, professional results.
Should You Use A Sublimation Oven Or A Heat Press?
Selecting your equipment requires balancing your needs. A tumbler heat press is Best for Beginners and small batches because it is Fast and controlled, using direct pressure for quick results. Conversely, a sublimation oven is Best for Batches and curved items because it provides even surrounding heat with shrink wrap.
Alternatively, a rotary press is Best for higher volume production to ensure smooth, repeated results. Each Equipment choice offers a different main benefit. Consider your project volume and space when deciding. Both options are effective, but your requirements will dictate the superior choice.
Customize stainless steel tumblers with bespoke or branded designs and make an impression
We supply high-quality custom stainless steel tumblers with your unique designs and an array of customization options to deliver for your aesthetic, practical, and promotional needs.
How To Make Sublimation Tumblers Look More Vibrant
Vibrant results depend on more than heat. Ink, paper, blank quality, pressure, and care all work together.
• Use premium sublimation ink.
• Choose high-quality sublimation paper.
• Use sublimation-ready blanks with a strong coating.
• Print at high-quality settings.
• Make sure the design is mirrored.
• Use firm and even pressure.
• Avoid touching the printed area before pressing.
• Let the tumbler cool before handling too much.
• Wash gently and avoid harsh scrubbing.
Good blanks matter most. A poor coating can make colors look dull even when the settings are correct. For stronger color and longer-lasting designs, explore premium sublimation-ready blanks through our website
These tips help anyone learning how to make a sublimation tumbler, how to make tumblers with sublimation, or diy sublimation tumblers get cleaner results.
Common Sublimation Tumbler Mistakes Beginners Should Avoid
Some of the most common mistakes are simple but costly, like the ones below;
• Using a regular tumbler instead of a sublimation-ready blank.
• Forgetting to mirror the design.
• Wrapping the paper too loosely.
• Using the wrong side of sublimation paper.
• Pressing with uneven pressure.
• Removing the paper while it shifts.
• Using low-resolution artwork.
• Ignoring supplier heat instructions.
Patience matters when making tumblers with sublimation. Avoid common errors like loose paper or improper heat. Knowing how to fix faded prints and ghosting on sublimation tumblers involves securing transfers tightly and ensuring correct temperature and time settings to prevent defects.
How To Fix Faded Prints And Ghosting On Sublimation Tumblers
Ghosting appears as a blurred second image caused by movement during the transfer process. Fading results from weak color due to poor transfer, low ink saturation, a weak coating, or incorrect heat settings. To prevent ghosting, tape the transfer tightly. Ensure the paper does not move during pressing, and use sufficient heat-resistant tape along the seam, top, and bottom edges.
To fix faded prints, evaluate your temperature, time, ink, paper, and blank quality. Only increase heat or time after checking supplier recommendations. If colors remain dull, upgrade your paper or print quality. This is vital for how to put sublimation on a tumbler with clean, professional results.
Frequently Asked Questions About How To Sublimate A Tumbler
Can You Sublimate On Any Tumbler?
No, you need a sublimation-ready tumbler with a polymer coating. Regular stainless steel, plastic, or glass tumblers will not work unless made for sublimation. The safest choice is to buy blanks labeled for sublimation on tumblers. This prevents wasted ink, paper, time, and heat press effort in your projects.
What Do You Need To Sublimate A Tumbler?
The main supplies needed for sublimation tumblers are a sublimation printer, sublimation ink, sublimation paper, heat-resistant tape, a heat press or oven, and a coated tumbler blank. For beginners asking what you need for the sublimation tumblers, start with a complete kit to learn how to make a tumbler with sublimation without guessing which tools work together. Once you understand the basics, you can sublimate tumblers in small batches and test your settings.